Lord Ihone Munro, AS L Project completed 4/16/16
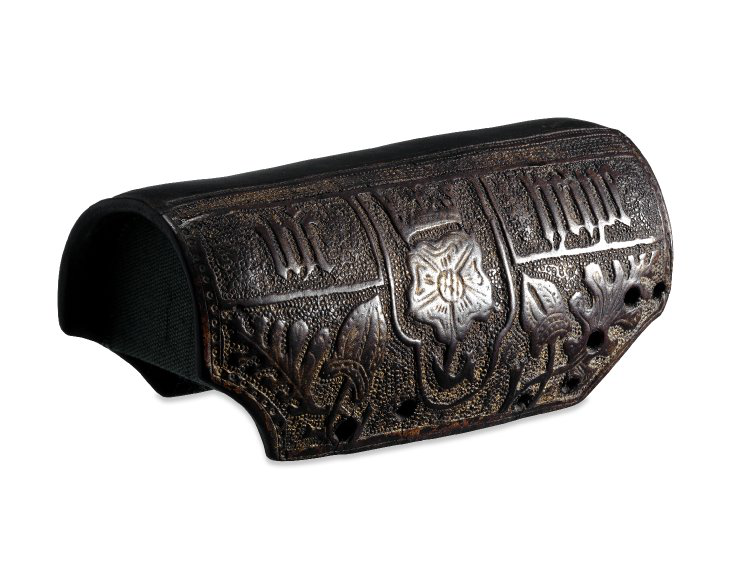
Inspired by early 16th century British (Mary Rose) wrist guard
Vambraces in their simplest definition protect the forearm from impact. Also known as bracers or arm guards, the term vambrace appears to originate somewhere in the 14th century, and generally would use boiled leather, steel or a combination of the two materials. Bracers were used to protect the forearm from impact while in combat, and can range in design and construction throughout period.
What’s not usually stated though is how important this simple piece of armor is to an archer. A single bracer is worn on the inside of the archer’s arm to protect it from string impact. This is important for accuracy, as it keeps the string from becoming entangled on a sleeve, causing an unpredicted fluctuation within the release of the arrow from the string. It’s also important in that the string scraping down the forearm and removing skin. In either event, wearing a bracer while shooting ensures a higher degree of accuracy, and lowers risk of a raspberry patch appearing on your arm.
The Inspiration Piece
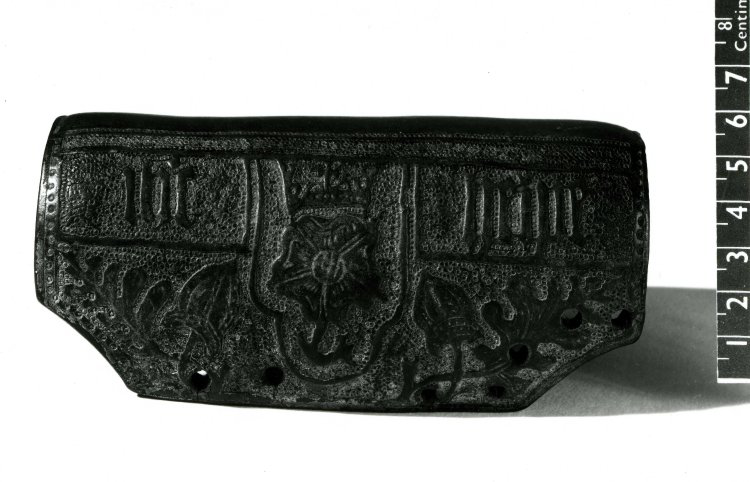
What is particularly important about this particular piece is that it is one of the most well preserved leather tooling examples that is on display. Since leather in and of itself tends to degrade with time and weather (and tooling can be pulled out with time and moisture), the piece is in excellent shape. Most of the tooling that was done used a “seeder”, a small tool that leaves a circle on the leather. Using this tool can be rather time consuming, since it is a very repetitive process to leave the circles in a patterned background. In this piece, you can also see the use of straight edged or “spoon” marks that leave behind the other indentions. The portions that were not tooled in still appear solidly raised, giving a distinct relief look.
Pieces such as this that have been discovered lay the groundwork for leather workers, in that the basic techniques are still used today. We have several options for patterns and shapes today, but without the fundamental techniques in place we would not be as well equipped to integrate our own personal touches into our work. It also shows trace gilding, letting us know definitively that additional color was applied directly to leather, laying the ground work for additional dye and paint processes that are used in modern pieces.
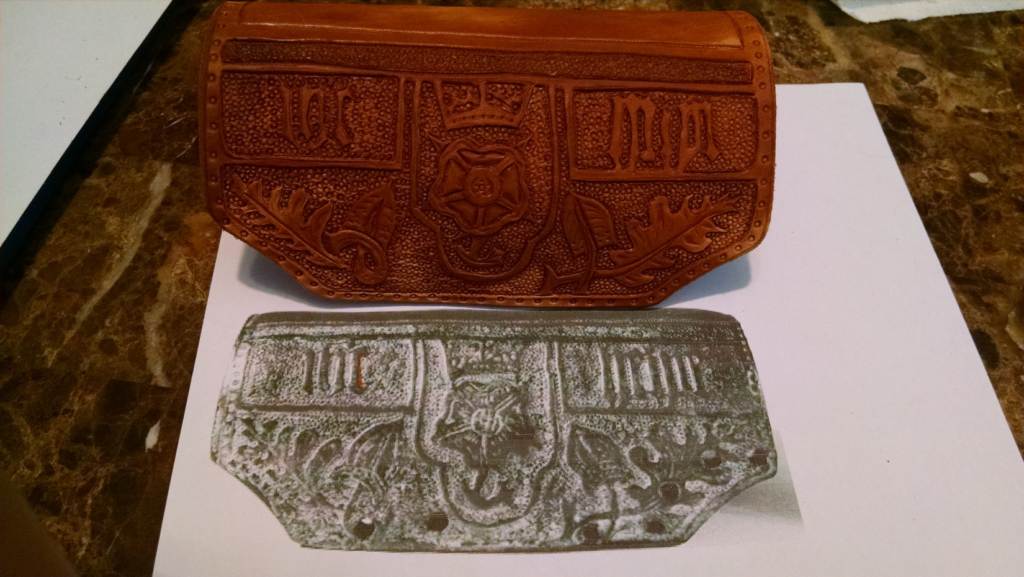
Reproduction Attempt
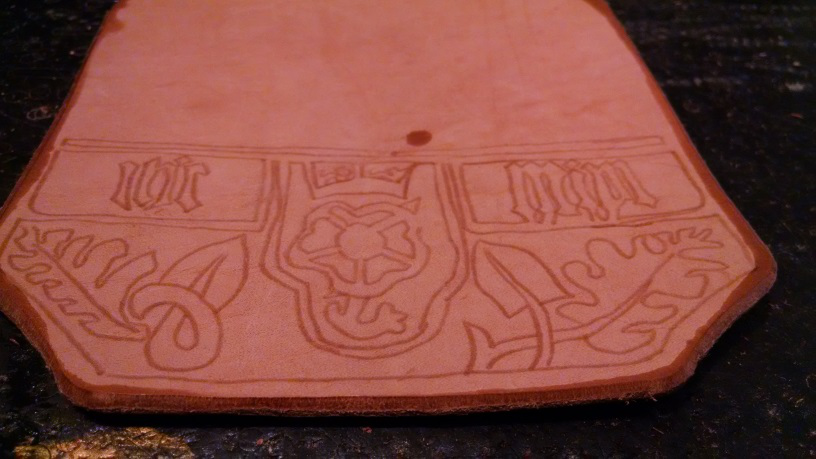
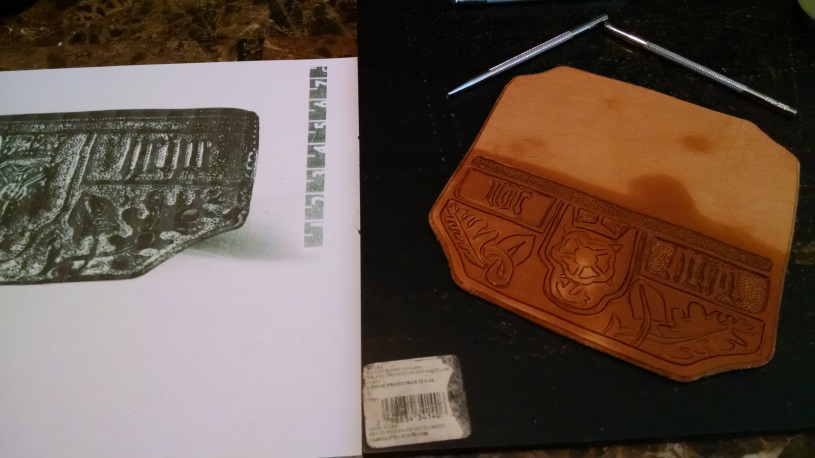
I started by blowing up a picture from the museum to get the piece closer to scale, then traced out the lines that I was able to make out. It gave me a rougher idea of where I was going to be guiding myself in the attempt to recreate the piece. Some of the lettering especially was difficult to transfer/read, so I’m sure that there are some issues in that part. For the process itself, the two silver tools pictured directly above were the primary tools used, though I did take my own liberties in doing knife cuts to the main lines prior to starting. The deviation from the apparent original piece stems mostly in that I did lay out my cut lines (instead of only using the seeder), then afterward I went back and used a beveller in order to make the lines themselves stand out a little more distinctly.
I’ve also left this particular piece natural, instead of putting any gilding or stain into it, which is rather unusual for me in general. In this instance, I wanted to show the natural discoloration that comes from the tooling process itself before color is applied. I also wanted to show an example of hardening leather without any cooking – the hardness of this piece comes from the tooling process in combination with the leather being wetted and dried repeatedly.