Based on period carving techniques and traditional Islamic design
Project Completed August 25, 2002
Form Follows Function – A Foreword
In thinking of this particular arts and sciences competition for Baronial Birthday, I had many different ideas of what might be of use to both Her Excellency and Sacred Stone itself. I thought of making a Middle Eastern handcart to help lug all of the baronial wares around. I also thought of making some type of barrel to keep bolts of fabric in that might be given away to some deserving gentle. More of these ideas flooded my mind, and I simply couldn’t decide what to work on. This prompted me to send a missive to Her Excellency to see what our beloved barony was most in need of.
I must admit, I can’t remember if it was shock and disbelief, or if it was simply confusion that filled my mind next. Her Excellency told me that there was no baronial treasure chest for her to put all of the different arts and science goodies that she was receiving. This solved my dilemma on what course of action to take next, as the cart (which was highest in my mind to build) took a seat on the back burner. After all, it’s hard to contribute gifts to a Baronial Treasure Chest if there isn’t a chest!
Wooden Boxes and Chests
First in my journey of building this box came the daunting task that I tend to undertake on occasion. That task is to try my hardest to tie the piece into my persona. Now, it’s quite well known (to those that attended Blue Mountain – The Silk Road a few months ago) that the Silk Road to the orient was in fact traveled heavily through the times that our society covers. What some may not know is that the route did indeed go through the areas that are now called the Middle East. It’s also known to most that the Ottoman Empire (not the foot stool mind you) did in fact contain port cities that are in the Middle Eastern region. The background for my project was formed.
Among the pirates, there was a fairly distinguished breed that stood out in our period. Those were the Barbary pirates. Among the Barbary pirates, there was a man called “Redbeard”. In 1529, Redbeard took control of the island of Peńon (off the coast of Algiers) by forcing the Spanish out. This dramatic move caused the Ottoman Empire to gain a foothold on the island. This event established a second point for my research – piratical influence and/or presence did exist in the region during the years of my persona.
The final piece of information that I needed was that of boxes and chests themselves, along with their usage. I have found that in the mid to late middle ages, chests and boxes were more important than they are even today. Chests were used to protect people’s property as they went on voyages, or store goods from vermin and parasites. Even those that were not well off with money could have a simple chest made to keep their belongings in. Knowing this information, I got to work.
Of Methods and Mayhem
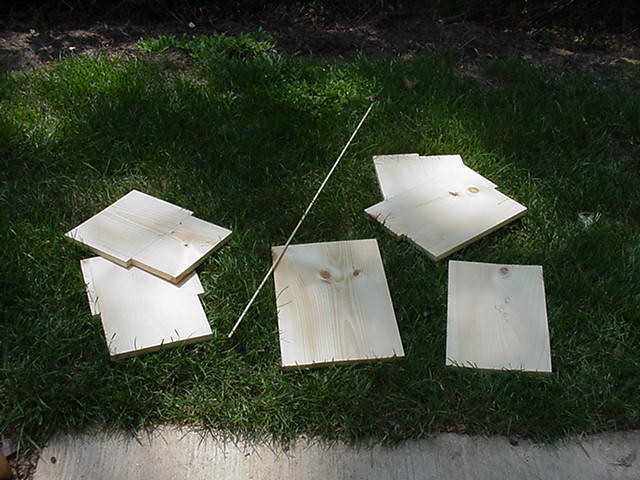
It was a rather daunting task to find out what a period design for a box or chest would be similar to. I prefer to look at the way actual period pieces that are in museums look, as opposed to looking at diagrams. The most period method that I have been able to find is a “6 board chest”, a box comprised simply of 6 different boards that are fastened together. This design is fairly simple to construct, and uses simple joints to hold the box together. I found a photograph of a chest that is dated to around 1500, and was quite ornate. I liked the construction, so I used it as a basis for my own box.
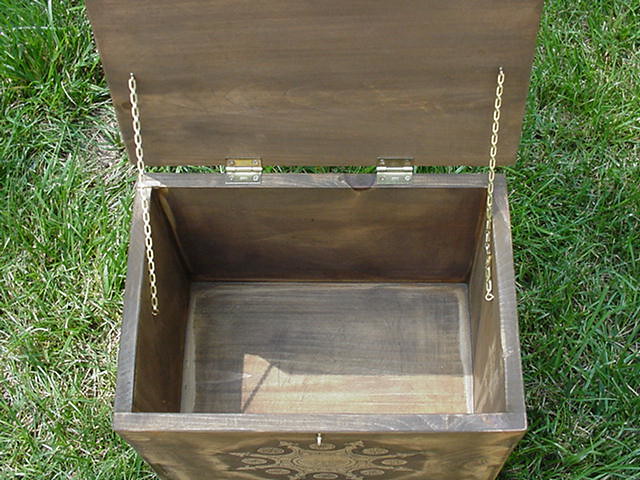
I set to work constructing a 6-board box, and it was rather quick to cut and put together. I assembled the box without the use of nails or screws. Instead I used a drill to make the holes where necessary, then pinned the box with sanded down sections of dowel. I used brass fittings for this box to include the hasp (little thing you put the lock through), hinges, chains, and handles. I did this despite the fact that my model piece did not use fittings at all. I thought that (in this case) it would be handier to be able to carry the box with ease in the future than to stick to perfect authenticity.
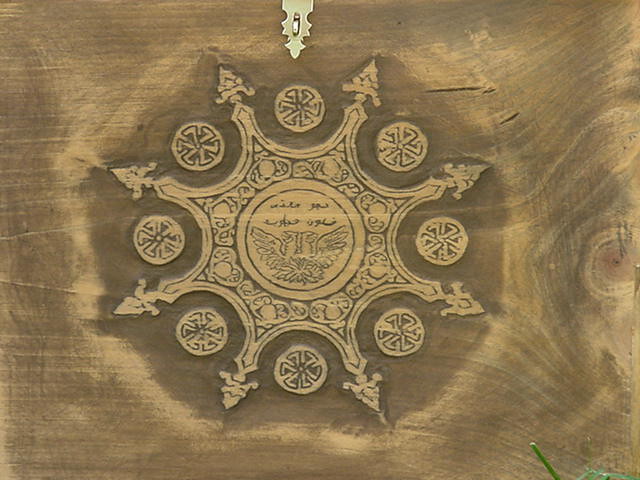
For the design on the front of the box (which I carved before staining and putting the top and fittings on), I used a blend of different elements that I found within a book of traditional Islamic art patterns. The first pattern was that of an eight- pointed Islamic star with a flowing pattern of hearts within it that dates back to the 12th or 13th century. This pattern had a disc in its center that held a depiction of a centaur-like creature. I replaced the creature with the two-headed phoenix of Sacred Stone’s badge, and found the Arabic translation for “Sacred Stone – Beloved Arts”. For the smaller discs around the star, I used a design from a pattern of a lotus (thanks to those folks traveling the Silk Road) from 14th century Egypt. I engraved the majority of the piece, then relief carved the outside edges to give more definition to the pattern.
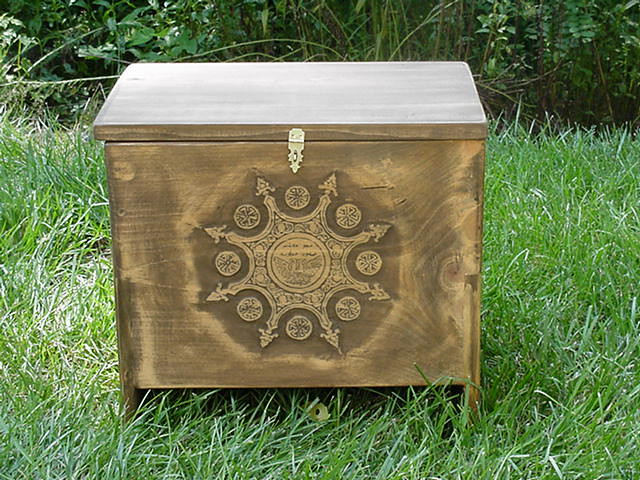
After I had finished carving, I began working on the finish for the piece. I didn’t want it to look brand new, as my intent was to have it appear to have been on a ship for a while before getting taken through the desert to the event. With this in mind, I made an initial staining with a walnut color, careful to wipe the majority of the stain off as quickly as possible. Doing this made the grain of the pine that I used for the box come out very definitively. After I had let the box set for a while with the walnut color, I started sanding down the box in different areas (giving the illusion of non-uniform wear and tear), paying careful attention to the
engraved design on the front of the box. As most engravings do not hold the entire piece intact from wear, I sanded down a few areas more heavily than others on the design. After sanding, I used an English oak stain to give a golden color to the wood and protect the now sanded areas of the box.
After finishing up the staining process, I put the lid of the box on with brass hinges and a brass hasp, then used a chain for a stopper for the top of the box. Using a chain stopper for the box top should prevent the slamming down of the lid backward against the body of the box. I also added brass handles so that the box can be easily carried.
Thoughts in Retrospect
I know quite well that this piece is not perfect. I didn’t really expect it to turn out as well as it did, this being my first attempt. I can quickly and easily point out each and every flaw within the box, but it would be both redundant and derogatory of me to do so. With that in mind – here I go.
I’m just kidding, of course. In all seriousness, I think that the flaws within this piece do indeed give it character. Given that the wood was noticeably warped, I knew from the offset that the box wouldn’t come out perfectly, so I let the majority of minor flaws stay in the wood intentionally. The inside of the box took a bit more care, as I didn’t want loose beads or other substances falling out of the box through the bottom or sides. To prevent it, I used a bit of wood filler. Other than that, I wasn’t too concerned.
I think that if I’m going for a reproduction piece, the aged and weathered look is the way to go. If I were going for a piece for a gift for friends, for example, I think I would be more apt to go for the new look in solid colors and whatnot. Either way, I’m pretty happy with the piece, especially since now I know a lot more for the next box I attempt to make.