Lord Ihone Munro, AS XLIX
Project Completed October, 2014
Inspiration Point and Reasoning
First and foremost, this was an exercise for me to do some work on getting a heraldic buckler put together. The main objectives were 1) that the covering not just be painted on, 2) it be put together in a manner that was compliant with current Atlantian rapier rules and 3) hold up during actual use. I didn’t want to just decorate something up, but it had to be usable for the field and hold up to some significant strain.
Honestly, I wanted to do the buckler in more of a Scottish Targe form, but I know it is post period. I’ve seen several tournament shields that are on display at the Metropolitan Museum of Art though. From what I’ve found, they were primarily done with formed wood core, then covered in burlap and painted in gesso.
Concept Integration
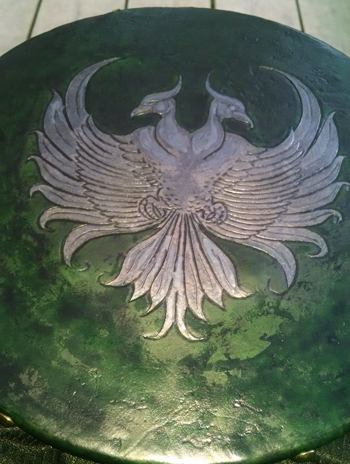
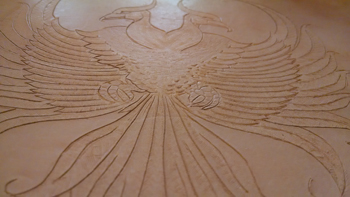
The concept was simple enough, after I found some source art that sparked some inspiration. I laid out the design and carved into the leather for added depth. From there, I worked in a bevel into the detail of the phoenix and lifted the edges somewhat to give a curl to the feathers. I also pushed up from the inside of the leather to give the breast and neck area of the phoenix some more dimension, before pulling it down flat.
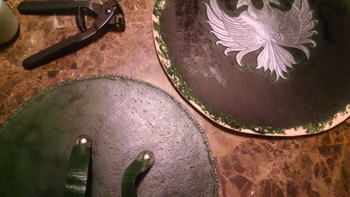
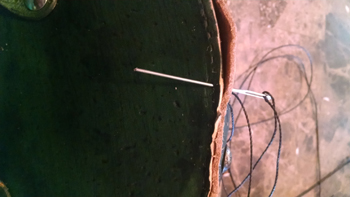
To mount the leather, I used a contact cement and set the inside lining to the particle board core. Once it had set, I put the straps in place with some Chicago screws and super glued the threads in place for a little more durability. Once it had set up, I wet formed the remainder of the face piece to the particle board in place and pulled the edges down. Using a hand punch, I set the stitching holes around both edges, then stitched the leather faces together along the seam using a saddle stitch. Since the holes didn’t perfectly line up, I did have to back stitch a couple times in order to get the thread lined up a little better. Once the piece had dried, I did add some antiqued tacks to give a little homage to the targe that I wanted to start with originally.
The painting process was a combination of water stains that are available from Tandy Leather. To get the mottled look, I distressed the leather by hitting it with a variety of rocks, then sponged on the green stain in multiple layers to bring in depth to the color. I used a silver stain on the phoenix in multiple layers as well, and once both sets of stains had set I used black antique to fill in the cut marks and indentions from the rocks. It was then sealed with a wax conditioner.
Comparing to period
I’ve seen plenty of gilding used in books of period, especially religious texts, but usually in shields I’ve only seen painting done on burlap or metal work used to enhance the design. In this case, I wanted to stick with a dyed/painted leather only implementation.
The possibility of using gilding techniques on a shield is certainly there, but the actual usage would probably be unlikely, since the gilding would end up probably detaching from the leather after it’d been rubbed or struck in use. Green dye in leather was not uncommon, but it’s normally notorious for being a pain to get to stick unless it’s being applied within the full wash methods. I chose to stick with the commercially available green instead of going with a period green, just based on availability at this time.