Mid-16th Century drawstring pouch, AS LIII
Techniques and Materials Used
- Doe skin body, straps and lace
- Hand stitching with waxed linen thread
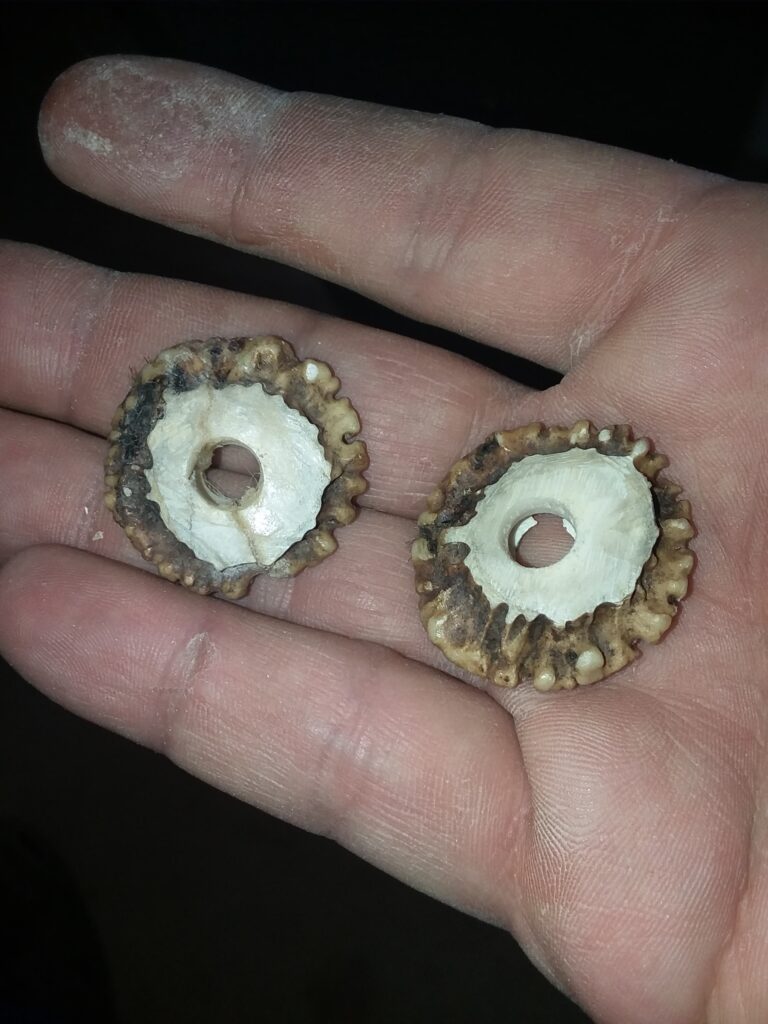
- Hand cut, carved and polished antler buttons
- Home-made dye (used to tint as a stain)

What are drawstring pouches?
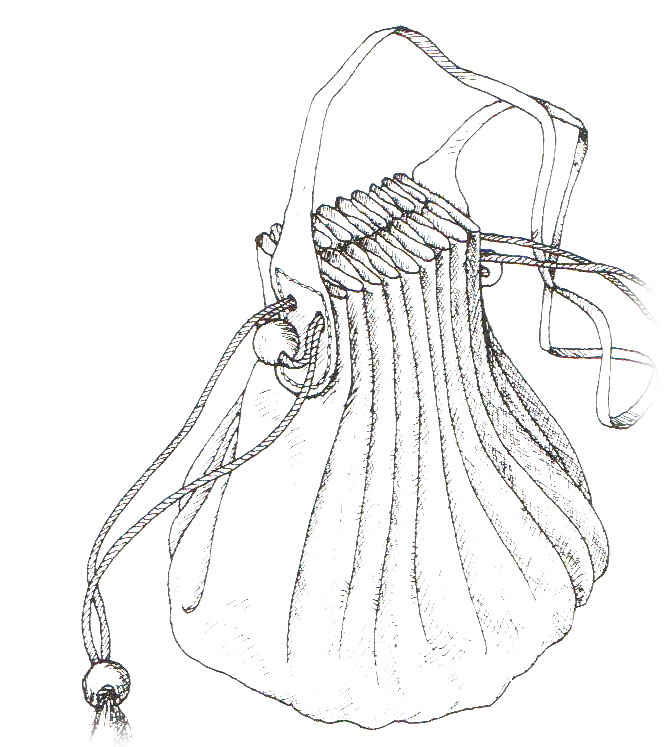
In simplest terms, drawstring pouches are corded pieces of leather or cloth that start off as a circle with a bunch of holes cut in them. Once a cord is threaded through the holes, you can then pull on the cord to pull the newly formed pleats together in order to close it.
They are typically made of rather thin and pliable material so that they form together fairly well, but the internal space inside the pouch is somewhat limited, as the pleats take up a considerable amount of material.
So why this piece?
Change purses such as this are relatively basic in look, and simple in design. So why bother with this going into a body of work on display? Sometimes the simplest solutions to common problems are the ones that stand through time. According to Goubitz (p61), 95% of pouches during this period of time were “closed by a drawstring device”. Examples would include laces, cords or straps used in the same manner, but the example referenced here caught my eye, in that it had an extra strap so that it could be looped over a belt instead of having to put a bag in another bag.
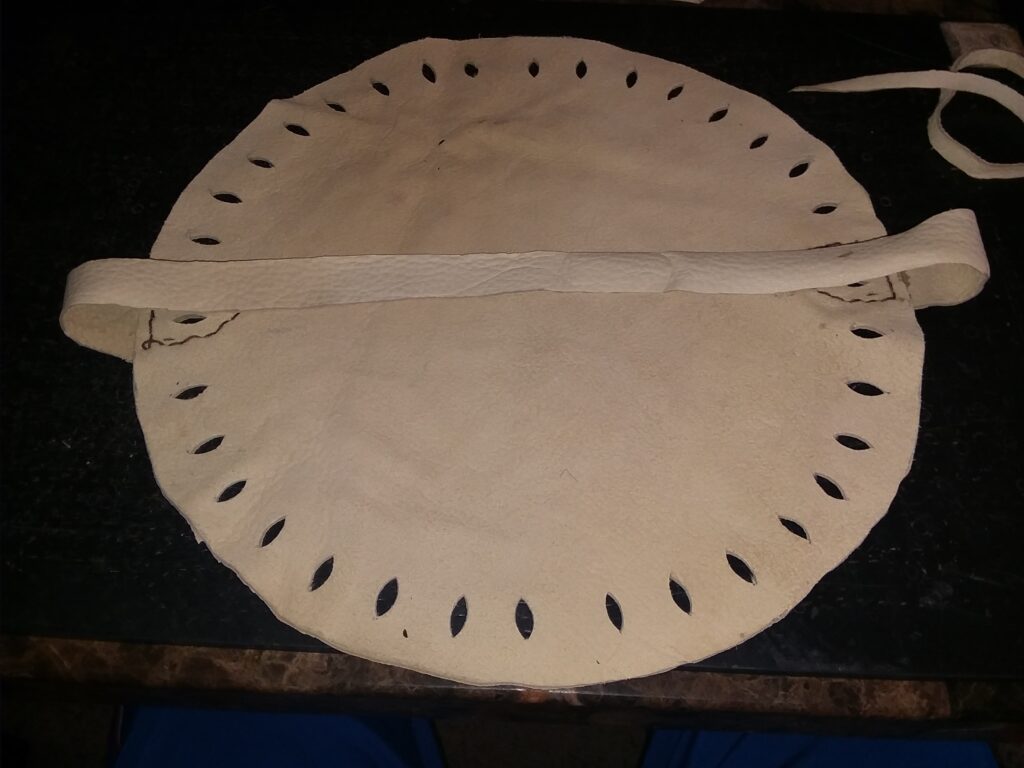
This piece is all doeskin, so the circle (main body) and strap that would loop over the belt were first cut out. I used slashes that were counted and measured out so that they could be drawn together with a wider lace that was cut out from doeskin as well. Once the belt strap was stitched in place and the lace threaded through the slits made into the leather.
I had some antler that I cut down to use as beads in this particular instance as well, since it was still a part of the deer I thought that it would be appropriate. I sawed the nubs off of the antlers, then drilled a central hole before buffing them to a bit of a shine.
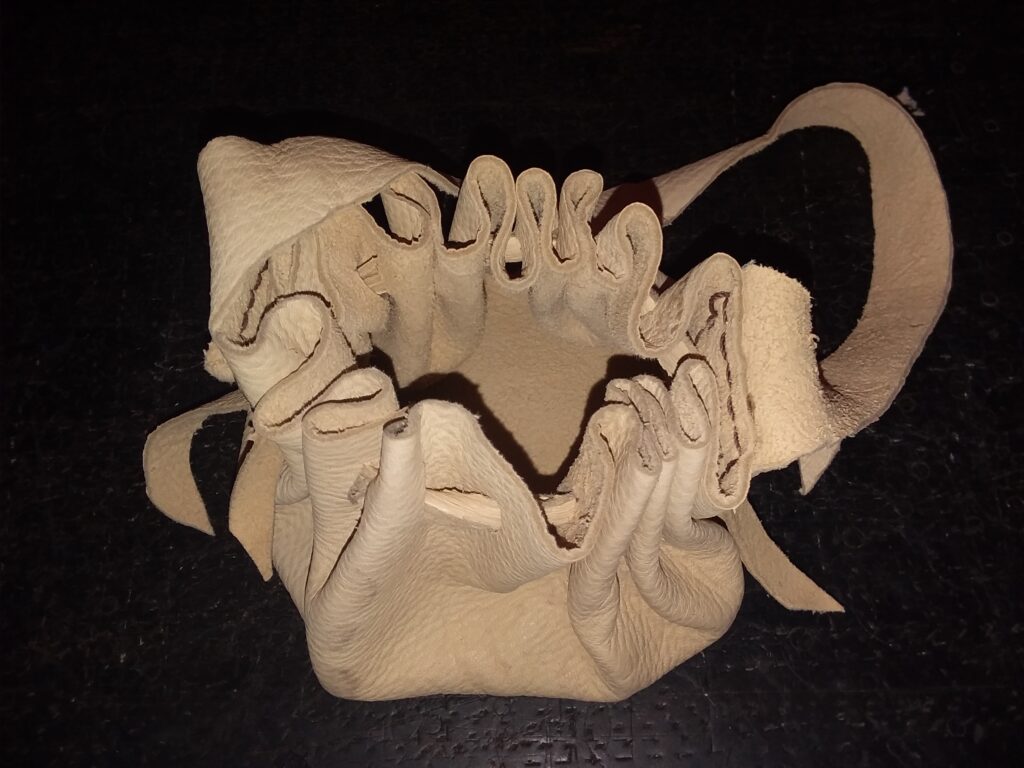
To finish off the pouch, I applied some dye that I had made from green husks (notes on the making of the dye are found in the binder as a separate reference).
Note that the dye itself does not take well on doe, since the chemical process that’s used is a little different than used in cowhide. I just wanted to tint down the inside (flesh side) a bit to give an added contrast to the finished piece.
I feel that it gives a more weathered look to the supple nature of the doeskin and removes a little of the sheen that can be found on a fresh cut of the material.
Reflections on the process
As mentioned, this is a relatively simple project that highlights a lighter-weight type of leather. The stretchy nature of doe and goat skins is great for smaller bags that need to be pleated or manipulated to its contents, such as gaming tokens or coins (not to mention as dice bags in the mundane world).
Doing these smaller pieces as such also speak to new solutions for people just starting into working with leather, so I wanted to include it here as an encouragement to people that are relatively new.
I will also admit here that after the display I will likely exchange the lace here with a piece of cord, so that it will pull through easier. I like that it has the lace from the same piece as the body, but I think that using some kumihimo cord will give it a little punch of color while improving function. I just did not want the cord to conflict with the period and location of the piece itself in this case (and I have less experience with fiber arts).